Resurfacing your pool ensures safety, durability, and a polished look. In Miami-Dade’s climate, intense heat, UV exposure, and mineral-rich water can quickly wear down pool surfaces. This guide outlines the key steps to a successful project, from assessing damage to choosing the best materials and maintaining your new surface.
Key Takeaways:
- Signs Your Pool Needs Resurfacing: Look for cracks, stains, rough textures, or unexplained water loss.
- Best Materials for Miami Pools:
- Plaster: Affordable but less durable in harsh conditions.
- Diamond Brite: Long-lasting, stain-resistant, and ideal for South Florida.
- Pebble Finishes: Durable and slip-resistant but rougher to the touch.
- Tile: Premium look with higher costs and labor needs.
- Timing: Schedule resurfacing between November and April for better weather conditions.
- Preparation Tips: Clear the pool area, follow local water disposal rules, and ensure contractors have easy access.
- Post-Resurfacing Care: Monitor water chemistry, brush surfaces, and maintain proper cleaning routines to extend the lifespan of your pool.
By addressing surface issues early, selecting the right materials, and following proper care steps, you can protect your investment and enjoy a smooth, safe pool for years to come.
Planning and Pool Assessment
Evaluate Your Pool’s Current State
Before diving into a resurfacing project, take some time to thoroughly inspect your pool. Walk around its perimeter and look closely for any visible issues, like fine cracks or web-like patterns – these can be early signs of wear and tear. Once you’ve assessed the condition, outline a realistic budget to ensure your renovation plans are financially manageable.
Complete guide to resurfacing a pool
Select the Right Resurfacing Material
Choosing the right resurfacing material can improve your pool’s look, extend its lifespan, and reduce maintenance headaches. In Miami-Dade County, where the climate presents unique challenges, it’s especially important to pick a surface that can handle the heat, humidity, and hard water. Let’s explore the materials and techniques that work best in these conditions.
Compare Material Options
Plaster finishes are a go-to choice for many due to their affordability and adaptability. However, under South Florida’s tough climate, traditional plaster tends to wear out faster.
Diamond Brite surfaces offer a more durable alternative. This quartz-based finish includes colored aggregates, creating eye-catching speckled designs while standing up to chemicals and stains. Its dense, non-porous structure makes it a strong match for Miami’s water conditions.
Pebble finishes combine natural stones with cement, delivering a highly durable and slip-resistant surface. While the texture is a bit rougher, the durability often makes it worthwhile.
Tile installations bring a high-end, long-lasting look to your pool. However, they require skilled labor and come with a higher price tag.
Account for Miami’s Climate and Water
Miami’s heat, intense sunlight, and hard water can take a toll on pool surfaces. High temperatures and harsh UV rays speed up water evaporation, which can concentrate chemicals and minerals, potentially damaging less durable finishes. The hard water in the area, rich in minerals, can also lead to scaling problems. Materials with a dense composition, like Diamond Brite, are better equipped to handle these challenges. Add in seasonal rains and constant UV exposure, and it becomes clear why choosing a resilient surface is essential to maintain both appearance and performance.
Surface Removal Methods
Before applying a new finish, removing the old one properly is key. Two effective methods stand out:
- Sand blasting: This technique uses sand media combined with water to strip away old finishes while keeping debris to a minimum. More costly, but it ensures an optimal surface for adherence of the plaster material.
- Hydro-demolition: High-pressure water jets are used to remove worn-out surface material without damaging the concrete underneath. This method is especially effective for pools with multiple layers of finishes or uneven surfaces.
Proper surface preparation is critical. The right removal method ensures a clean slate, setting the stage for a high-quality, long-lasting finish.
Get Ready for Resurfacing
Taking the time to prepare properly can help avoid delays and protect your property during resurfacing.
Time Your Project Right
Plan your resurfacing project between November and April, when rainfall is minimal, and humidity levels are lower. Avoid scheduling work from May through October, as frequent thunderstorms and hurricane risks can disrupt progress. Cooler winter temperatures also create a more comfortable environment for contractors, which can lead to better attention to detail.
Think about your family’s schedule, too. Pool resurfacing usually takes 3 to 5 days, depending on the material and weather conditions. It’s a good idea to plan around vacations, holidays, or any special events when you’ll want the pool ready for use.
Empty and Clear the Pool Area
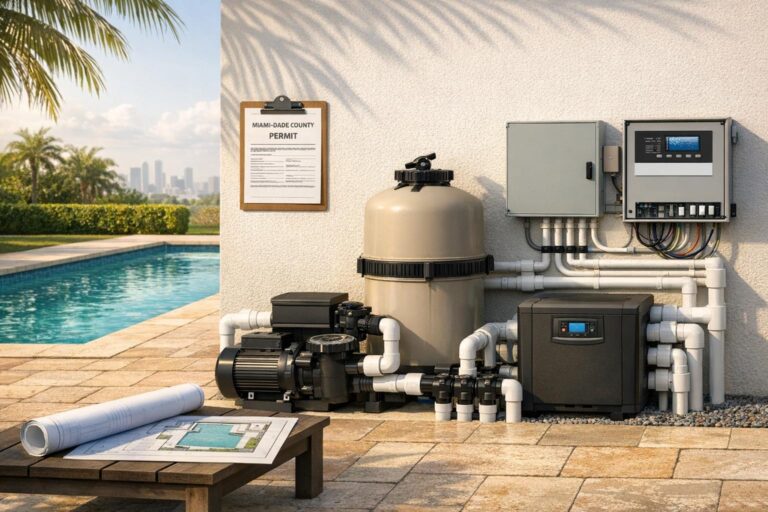
Before draining your pool, make sure to follow Miami-Dade County’s water disposal regulations. Check with your local water management district about when and where pool water can be discharged, as some areas have restrictions. Many contractors handle permits for you, but it’s always wise to confirm who’s responsible for this step.
When the project is scheduled, clear the area around your pool to give workers plenty of room. Remove all furniture, decorations, and equipment within a 20-foot radius. Store these items indoors or cover them securely to protect them from dust or debris.
Take steps to protect your landscaping as well. Trim back plants and shrubs near the pool edge, and cover delicate vegetation with plastic sheeting or burlap to shield it from dust and debris. The resurfacing process can generate a lot of material, which might harm nearby plants if they’re not properly protected.
Also, make sure to move vehicles from driveways and parking areas that contractors will need for heavy equipment or material deliveries. Clear access routes are essential for worker safety and to avoid property damage.
Work with Your Contractor
Good communication with your contractor is key to a smooth project. Discuss access routes, daily work schedules, and neighborhood quiet hours ahead of time. Go over the project timeline, parking arrangements, and payment schedules to avoid any surprises.
Clarify payment schedules and change order procedures before the work begins. Be sure you understand what counts as additional work beyond the original scope and how those costs will be handled. Addressing these details upfront helps prevent disputes and keeps the project on track.
sbb-itb-a36f8f1
What Happens During Resurfacing
Each stage of the resurfacing process plays a critical role in giving your pool a fresh, durable finish.
Strip the Old Surface and Prepare the Pool
The process kicks off with the complete removal of your pool’s old surface. Using specialized tools, contractors strip away the existing finish – whether it’s plaster, pebble, or tile. This step ensures a clean slate for the new material.
Once the old surface is gone, the pool shell undergoes a close inspection. Contractors address any cracks or chips, filling smaller ones and tackling bigger structural issues. After repairs, they apply a primer or bond coat to promote proper adhesion of the new finish. This step is particularly important in areas like Miami-Dade, where weather conditions can influence curing times. With a solid foundation in place, the pool is ready for the next phase.
Apply the New Finish
With the prep work done, it’s time to install the new surface. For aggregate finishes, materials are mixed on-site and applied using pneumatic sprayers. Excess cement is removed to expose the aggregate, and the surface is hand-toweled to achieve the desired texture and appearance.
If traditional plaster is being used, contractors apply it section by section with trowels, paying close attention to fittings and edges to ensure a smooth, uniform finish.
Refill and Balance the Pool
Once the new surface has been applied and fully cured, the pool is refilled with water. For finishes like PebbleTec, contractors follow up with a pressure wash and an acid treatment. This final step removes any leftover residue and brings out the finish’s full appearance, leaving the pool ready for use.
Care for Your New Pool Surface
Taking care of your resurfaced pool is just as important as the installation itself. With the right attention, especially during the first month, you can ensure your pool remains beautiful and durable for years to come. This is an investment worth protecting, so let’s dive into the essentials.
Follow Start-Up Instructions
The first 30 days are crucial for allowing the new surface to cure and settle properly. During this time, your pool needs extra care to avoid any damage. One of the most important steps is testing the water chemistry every 2–3 days for the first month, then moving to weekly checks as part of your regular routine.
| Chemical Parameter | Ideal Range (ppm) |
|---|---|
| pH | 7.2 – 7.6 |
| Chlorine | 1 – 3 |
| Alkalinity | 80 – 120 |
| Calcium Hardness | 200 – 400 |
| Cyanuric Acid | 30 – 50 |
Avoid using too much chlorine during this initial phase, as it can harm the new finish. Cleaning methods will also depend on your resurfacing material. For example, plaster surfaces need thorough brushing twice a day for the first two weeks to clear away plaster dust. On the other hand, newer finishes like ecoFINISH should be brushed gently with a soft-bristle brush every day for the first week. Adding a sequestering agent during this phase can help prevent metal stains from forming.
Keep an eye on the water level daily, ensuring it stays at the midpoint of the skimmer opening. This helps your pump work efficiently and ensures the skimmer functions as it should. Once the start-up phase is complete, you can shift to regular maintenance to keep your pool in top shape.
Maintain Regular Pool Care
Consistent care is the secret to a pool that always looks inviting. Start by skimming the surface daily to clear away debris like leaves or bugs that could stain the finish. Vacuum the bottom weekly to remove dirt and algae buildup, and don’t forget to brush the walls, steps, ladders, and areas with low water circulation at least once a week to prevent algae growth.
Your filtration system also needs regular attention. Clean or replace filters every week to keep the water clear. If you have a plaster surface, you might need to backwash more frequently due to leftover plaster dust. Newer finishes generally create less residue, so they require less frequent backwashing.
As the seasons change, adjust your cleaning schedule and chemical monitoring. During cooler months, balance the chemicals before scaling back usage, lower water levels if necessary, clean filters thoroughly, add winterizing chemicals, and secure your pool cover to protect it through the winter.
Know Your Warranty Coverage
In addition to daily care, understanding your pool’s warranty is essential for long-term peace of mind. Alligator Pools offers a 3-year workmanship guarantee for resurfacing projects, which covers installation-related defects and issues like premature surface failure due to application problems. However, keep in mind that damage caused by poor chemical maintenance, physical abuse, or normal wear and tear typically isn’t covered.
If you notice any issues, document them with photos and contact your contractor right away. Many problems covered by the warranty will show up within the first year, so it’s wise to monitor your pool closely during this time. Keeping detailed records of your maintenance – such as water test results and chemical treatments – can make filing a warranty claim much smoother.
Lastly, consider scheduling professional inspections annually. These check-ups can catch small issues before they become big problems, helping your pool surface stay in great condition for years to come.
Conclusion: Get the Best Resurfacing Results
Let’s wrap up with the essentials for achieving a successful pool resurfacing project.
Resurfacing your pool isn’t just about aesthetics – it’s a long-term investment that can completely elevate your outdoor space. To make the most of it, here’s what you need to keep in mind:
- Preparation is key: Take the time to assess your pool’s condition, create a realistic budget, and ensure you’re compliant with local regulations. This upfront effort helps you avoid unnecessary delays and unexpected expenses.
- Pick the right materials: Opt for materials that can handle South Florida’s intense sun, heat, and frequent rain. Durability matters when dealing with the elements.
- Work with a professional pool contractor: Contractors who understand local conditions can help with everything from securing permits to scheduling and prepping your pool the right way. Their expertise ensures the job is done efficiently and correctly.
- Don’t skip post-resurfacing care: The first 30 days are crucial. Follow the start-up instructions provided and stick to a proper maintenance routine to allow the surface to cure as it should.
A well-executed resurfacing project does more than protect your pool – it adds value to your home and creates a space where memories are made. By investing time and effort now, you’ll enjoy a pool that’s not only durable and beautiful but also a source of peace of mind for years to come.