Buying a home in Miami with a pool sounds like a dream, but it can come with hidden costs and risks. A quick inspection can help you spot potential issues like leaks, cracks, or faulty equipment before you commit. Here’s a 10-minute checklist to evaluate water quality, surfaces, equipment, and safety features. Use this to negotiate repairs or adjust the price, and consider hiring a professional for a detailed inspection if red flags arise. Don’t skip this step – it could save you thousands in repairs and ensure your pool is safe and functional.
5 Tips on a Pool Inspection for a Home Buyer – The Houston Home Inspector
sbb-itb-a36f8f1
Getting Ready for Your Pool Inspection
Taking some time to prepare before your pool inspection can help you make the most of it and catch potential problems early. Start by reaching out to the seller or agent to confirm that all pool equipment is in working order. This step helps avoid unnecessary delays. If the pool has a heater, ask them to turn it on about 30 minutes before you arrive. Heaters need that time to show whether they can hold temperature properly or if there are issues like leaks or gas odors.
Try to schedule your inspection during peak daylight hours. Bright sunlight makes it easier to spot surface cracks, defects, or water clarity problems. Steer clear of rainy or overcast days, as poor visibility can make it hard to see the pool’s bottom or detect sediment buildup.
Tools You’ll Need
You don’t need an elaborate setup for your inspection – just a few essentials will do. A smartphone is incredibly handy. Use it to snap photos of equipment model numbers, document any visible damage (like bulging PVC pipes), and even record the sound of motors in action. A flashlight is another must-have for checking dark corners and ensuring GFCI outlets are functioning. A simple notepad and pen can come in handy for noting equipment ages from labels and jotting down any concerns.
Bring along a basic pool water testing kit or test strips to quickly check pH levels, chlorine, and alkalinity. Gloves are also a smart addition – they’ll protect your hands when you’re reaching into skimmer baskets or handling potentially hot equipment.
Once your tools are ready, make sure the inspection conditions are ideal for a thorough review.
Best Conditions for Inspecting
Clear water is a must for any pool inspection. You need to see the bottom of the pool to check for sediment buildup, debris, or structural cracks. If the water is cloudy or green when you arrive, it’s a warning sign that there could be filtration or maintenance issues. Confirm with the seller that all utilities – electricity and water – are turned on so you can test the pool’s pumps, heaters, and lights during your visit.
For an extra check, turn off the equipment for 5–10 minutes before restarting it. This can help you spot startup issues like grinding noises or excessive vibrations, which might indicate failing bearings or other mechanical problems that aren’t obvious when the equipment is already running smoothly.
The 10-Minute Pool Inspection Checklist
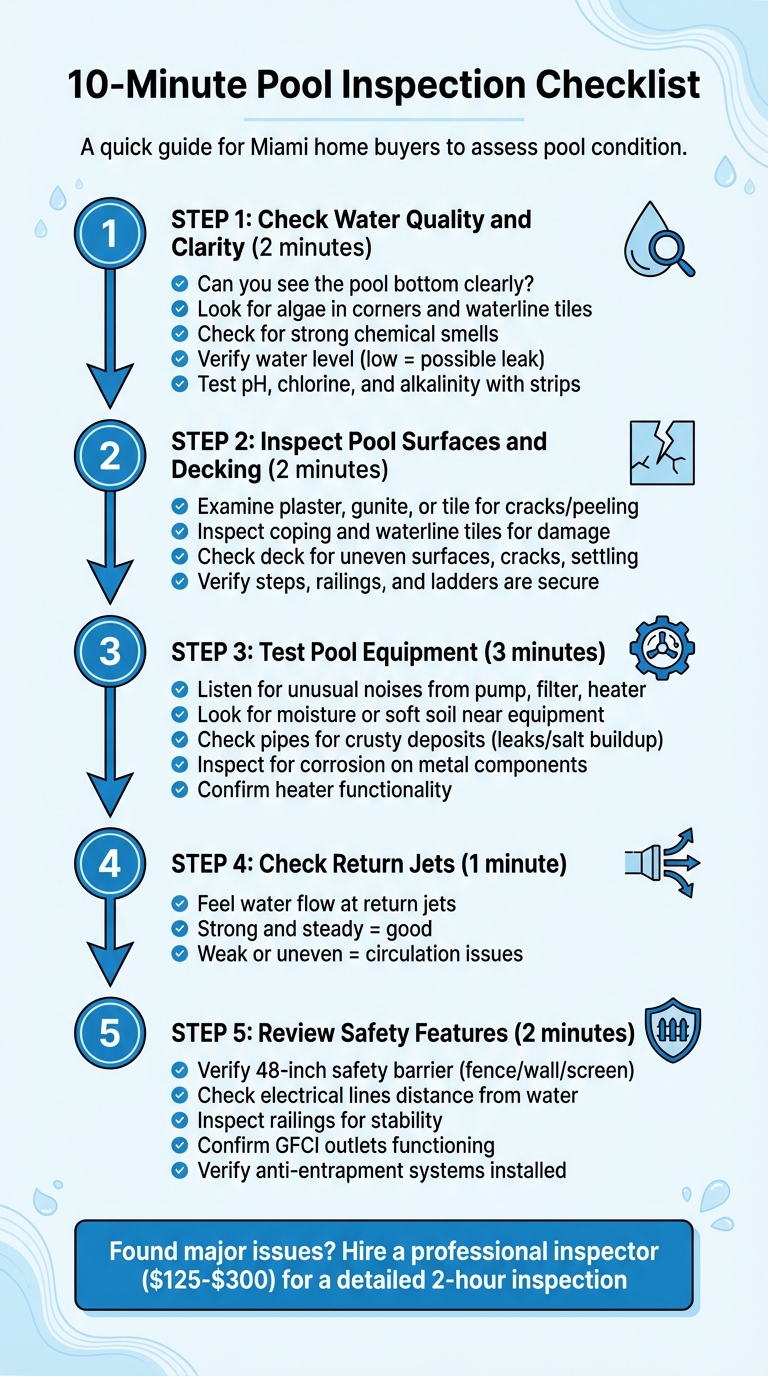
10-Minute Pool Inspection Checklist for Miami Home Buyers
Use this quick 10-minute checklist to evaluate key areas of a pool before purchasing a property. It’s a simple yet effective way to focus on the pool’s functionality and safety, building on any earlier preparation you’ve done.
Step 1: Check Water Quality and Clarity
Start by observing the water. If you can clearly see the bottom of the pool, that’s a good sign the filtration system is working well. However, cloudy or discolored water can indicate issues with filtration or chemical imbalances [4]. As you walk around the pool, look for algae, especially in hard-to-spot areas like corners, textured surfaces, or along waterline tiles [4][7].
"If you notice your pool water is cloudy, discolored, or has an unusual odor, this may indicate a water chemistry imbalance that should be addressed immediately." – South Florida Custom Pools [4]
Pay attention to strong chemical smells, which might suggest chlorine issues or an underperforming filtration system. Also, check the water level – if it’s unusually low (beyond normal evaporation), it could signal a leak. If you have test strips handy, quickly check the pH, chlorine, and alkalinity levels for a clearer picture.
After this, move on to checking the pool’s surfaces.
Step 2: Inspect Pool Surfaces and Decking
Take a close look at the pool’s interior finish, whether it’s plaster, gunite, or tile. Cracks, peeling, or worn spots can indicate the need for pool resurfacing [1]. Also, inspect the coping and waterline tiles for any damage or signs of wear [7].
Next, examine the pool deck. Uneven surfaces, cracks, or settling could be trip hazards, especially in areas like Miami, where sandy soil and shifting ground are common [3]. Large cracks or significant settling might point to deeper structural problems [7]. Don’t forget to check the condition of steps, railings, and ladders – they should be secure and free from visible damage [3].
Step 3: Test Pool Equipment
Head over to the equipment area and make sure everything is running smoothly. Check the pump, filter, and heater for any unusual noises or signs of malfunction [6].
Look around for moisture or soft soil near the equipment, as this could indicate leaks. Pipes with crusty deposits might also suggest leaks or salt buildup [6]. Since Miami’s coastal environment can be tough on metal, inspect for any signs of corrosion. If the pool has a heater, confirm that it’s functioning properly.
Step 4: Check Return Jets
Feel the water flow at the return jets. Strong and steady flow is ideal, while weak or uneven flow could mean circulation issues [6].
Step 5: Review Safety Features
Finally, assess the overall safety of the pool area. Look for anything that could pose a hazard and ensure that safety measures are in place.
"The main objective of a pool inspection in Miami is to determine whether the pool system is operating properly and to identify safety hazards." – Florida Inspections Unlimited [1]
What to Do With Your Inspection Findings
After completing your 10-minute inspection, it’s time to assess which issues need immediate attention. Go over your findings carefully – some minor problems might be quick fixes, but major ones could result in expensive repairs.
Spotting Major Problems
Pay close attention to any serious red flags. For example, if you noticed cracks in the pool shell or unusually low water levels during your inspection, take a closer look. Large cracks in the shell or plaster often signal structural problems that require professional evaluation [5][7].
Don’t overlook equipment issues either. Recheck signs like strange motor noises, warped PVC piping, or worn filters that you might have spotted earlier [5]. Safety concerns are equally critical – think about electrical lines too close to the water, loose railings, or fences that don’t meet height regulations. These problems aren’t just hazards; they can also give you leverage to negotiate repairs or reduce the purchase price [6][3][8].
When to Hire a Professional
If your initial inspection has raised concerns, it’s a smart move to call in a licensed inspector before making any final decisions. A professional pool inspection usually runs between $125 and $300 and takes a couple of hours [9]. This step can uncover hidden repair needs or equipment issues that may not have been obvious during your walkthrough.
"Failing to get a pool inspected by a licensed professional could prove to be an extremely costly decision down the road if there are any underlying or unforeseen issues." – Dan Christoforo, Director of Service, Aquatic Pool & Spa Services Inc. [11]
Professionals, such as those at Alligator Pools, can assess key equipment, provide repair estimates, and outline future pool maintenance costs [10]. They’ll also check technical aspects you might miss, like verifying GFCI protection, ensuring anti-entrapment systems are installed, and confirming the pool complies with local codes [9][6]. Most inspectors deliver a detailed report, including repair recommendations and cost estimates, within 24 hours [11]. Armed with this information, you’ll be better positioned to negotiate for repairs or adjust the purchase price confidently.
Miami-Specific Pool Inspection Factors
Miami’s unique climate and hurricane risks call for extra attention during pool inspections. Beyond the standard checklist, you’ll need to address challenges tied to South Florida’s weather and coastal conditions to ensure the pool is ready to handle these environmental stresses.
Hurricane Damage and Preparedness
Hurricanes can wreak havoc on pools and their surroundings. Start by inspecting the pool deck for any settlement issues, which can happen when storms saturate the soil or cause erosion. Look for uneven surfaces or gaps that might suggest movement [3].
Check ladders, railings, and diving boards for signs of wind damage or impact-related loosening [3]. If the property is near the coast, examine sea walls or other protective structures designed to shield the pool area from storm surges [3]. Also, ensure that safety fences, gates, and enclosures remain sturdy and meet local safety codes, especially after exposure to high winds [3].
Hurricane-related plumbing leaks can be tricky to spot. To address this, consider hiring a professional to conduct a leak test, which can uncover hidden issues that might not be visible during a basic inspection [7]. Once this is done, shift your focus to how Miami’s salty environment might impact the pool’s components.
Saltwater Pools and Corrosion
South Florida’s humid, salty air can speed up corrosion on pool equipment and metal fixtures. Pay close attention to ladders and railings, checking for looseness or signs of deterioration [3]. Examine the electrical system and wiring, as salt and humidity can increase wear and potentially lead to faults [3].
Inspect pumps, motors, and valves for salt buildup or pitting, which can indicate damage [7]. Look at the salt chlorinator for leaks or excessive wear, and check for stains on the pool finish – these could be a sign that corroding metal components are leaching into the water [7]. Lastly, confirm that any structural changes or equipment updates comply with local permits and safety standards.
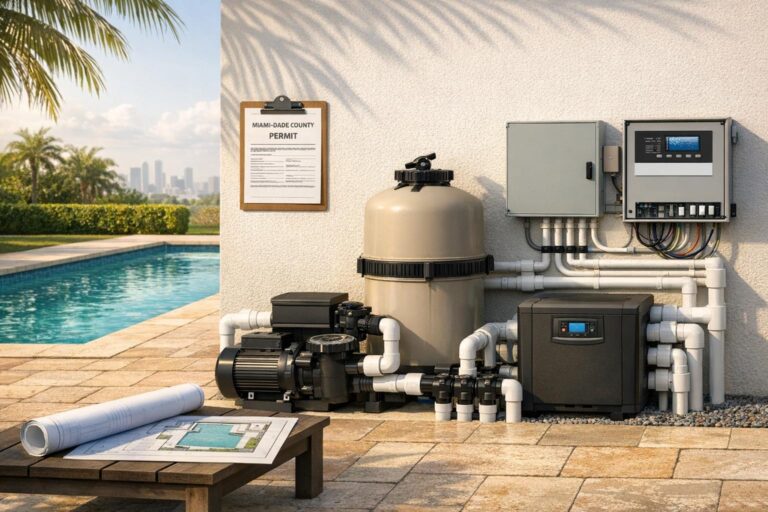
Check Permits and Code Compliance
In Miami-Dade County, the responsibility for illegal construction or expired permits transfers to the buyer once the property is purchased [13]. This makes it essential to verify that all permits are up-to-date before closing.
Request a lien records search and an open permit search through the Regulatory and Economic Resources department [13]. The lien search can help identify violations like "Work Without Permit", "Expired Permit", or "Unsafe Structures", while the open permit search ensures that all previous work was properly finalized and inspected [13].
Ensure the pool has a permanent 48-inch safety barrier – this could be a fence, wall, or screened-in patio – measured from the side facing away from the pool. Also, confirm that all electrical installations, including low-voltage underwater lights, meet local codes [12][15].
According to the Miami-Dade County Mandatory Disclosure Statement, buyers may be held responsible for resolving illegal construction or outstanding code violations discovered after purchasing the property [13].
Use the Miami-Dade online portal to check building permits, inspection history, and zoning violations tied to the property address [13]. For properties with a commercial or public pool, confirm that it holds an annual operating permit from the Florida Department of Health. This permit must be renewed every July 1st [14].
Conclusion
In Miami’s challenging climate – marked by hurricane risks, saltwater corrosion, and strict building codes – a quick visual check of a pool only scratches the surface. Factors like water clarity, surface cracks, equipment functionality, and safety features can indicate whether you’re dealing with a well-maintained feature or a potential money pit. This initial assessment is a vital step before committing to a purchase.
"Pool inspections can save lives and money. A cracked wall or broken filter might not seem like a big deal, but it can cause significant damage or safety risks over time." – RocketEditor, Home Inspections Miami [2]
Your inspection checklist is more than just a formality; it’s a tool to help you safeguard your investment. Use it to negotiate repairs or price adjustments. If you uncover major concerns like structural damage, faulty equipment, or unresolved permit issues, it’s important to bring in a certified pool professional for a detailed evaluation. These professional inspections, which usually take 1 to 2 hours, provide a thorough report that can be a powerful asset during negotiations [2].
If pool problems come to light after the purchase, Alligator Pools is ready to step in. From resurfacing cracked plaster and replacing outdated pumps to upgrading electrical systems, we ensure your pool meets all safety and code requirements. With over 40 years of experience in Miami-Dade County, we specialize in turning aging pools into safe, beautiful spaces through expert repairs, equipment upgrades, and complete renovations.
Don’t let pool issues disrupt your dream home purchase. A thorough inspection not only protects your investment but also ensures your family’s safety and sets the stage for stress-free pool ownership from day one.
FAQs
What should I check for when inspecting a pool before buying a home?
When examining a pool, start with the water clarity – murky or algae-filled water might signal neglect or poor upkeep. Check for cracks or damage in the plaster, tiles, or liner, and watch for signs of leaks, like damp areas or unusual water loss. Take a close look at the pool equipment, such as pumps, filters, heaters, and plumbing, to ensure everything is working correctly and isn’t showing signs of rust or wear. Lastly, verify that all safety features, including fencing, gates, and covers, are intact and in good working order. Spotting these problems early can save you from expensive repairs down the road!
How can I use pool inspection results to negotiate the home’s purchase price?
If the pool inspection uncovers any problems, you can use those findings to negotiate with the seller. You might ask them to fix the issues before closing or offer a credit to cover the estimated repair costs. This could help you either reduce the purchase price or ensure the pool is in good shape when you move in.
Talk with your real estate agent to decide the best way to present your requests. They can guide you on how to back up your negotiation points with the inspection report.
When is it necessary to hire a professional for a pool inspection?
Buying a home with a pool? Make sure to bring in a licensed pool inspector before sealing the deal. A professional inspection can reveal hidden problems like leaks, faulty equipment, or structural damage – issues that might slip under the radar during a casual walkthrough.
After you’ve moved in, it’s smart to schedule a thorough pool inspection annually. Regular check-ups ensure that everything – from the equipment to the electrical systems – is in good working order, helping you avoid expensive repairs later on.